This is the intro I wish I had.
If you've looked at Rust, gotten scared off by the syntax, and closed the tab, this post is for you. It's the written companion to Episode 01 of Rust, from zero.
In ~17 minutes (or however long it takes you to scroll), we'll cover chapters 1 to 3 of the Rust Book (skipping chapter 2 for now): installing Rust, writing your very first program, variables, mutability, scalar and compound types, your first struct, functions, comments, if/else, and loops.
No prior systems experience needed, you can just start right away.
Watch the video: Rust from Zero · Ep 01 on YouTube
Full companion guide: zerotorust.com
Follow along in the book: The Rust Programming Language, chapters 1 to 3
Why Rust?
Rust is the fastest-growing programming language in the world right now. JetBrains called it the future of programming. So what's behind the hype? Or is it just overhyped?
Three reasons actually. Let's dive in and explore those.
- Memory safety. Rust catches whole categories of bugs at compile time. The kind of bugs other languages catch at three a.m. in production.
- Fearless concurrency. You can write multi-threaded code, and the compiler proves it's free of data races before it runs.
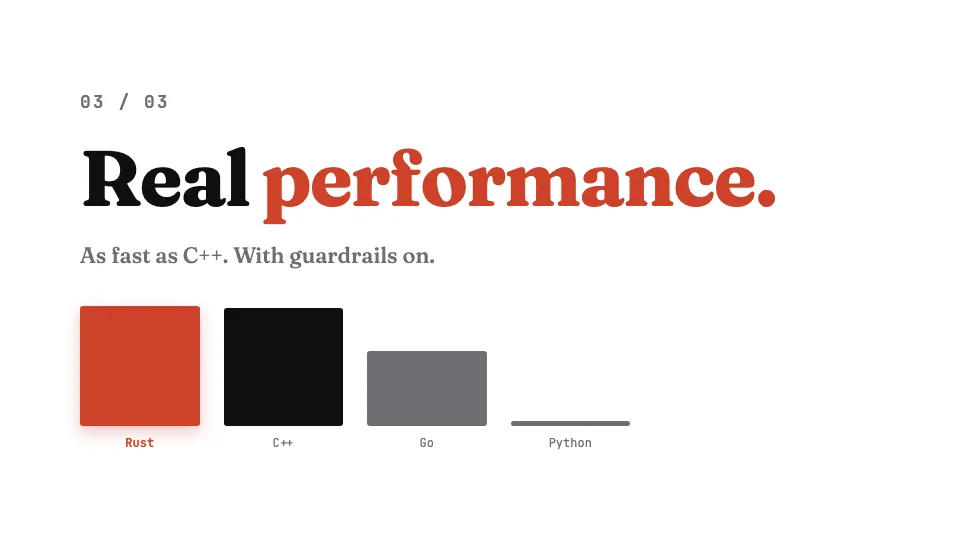
- Real performance. As fast as C++, with guardrails on. No garbage collector pauses, no surprises.
That's the reasons. Now let's actually use it and get our hands dirty by writing some code.
Chapter 1: Setup
Install Rust
Installing Rust takes one command. Open your terminal, paste this, and hit enter:
curl --proto '=https' --tlsv1.2 -sSf https://sh.rustup.rs | shThe script downloads and sets up rustup, the official Rust installer. Once it's done, confirm it's working:
rustc --versionIf you come across some issues then check the official rust book (https://doc.rust-lang.org/book/).
That's it for now. You're ready to start writing Rust code.
cargo new vs cargo init
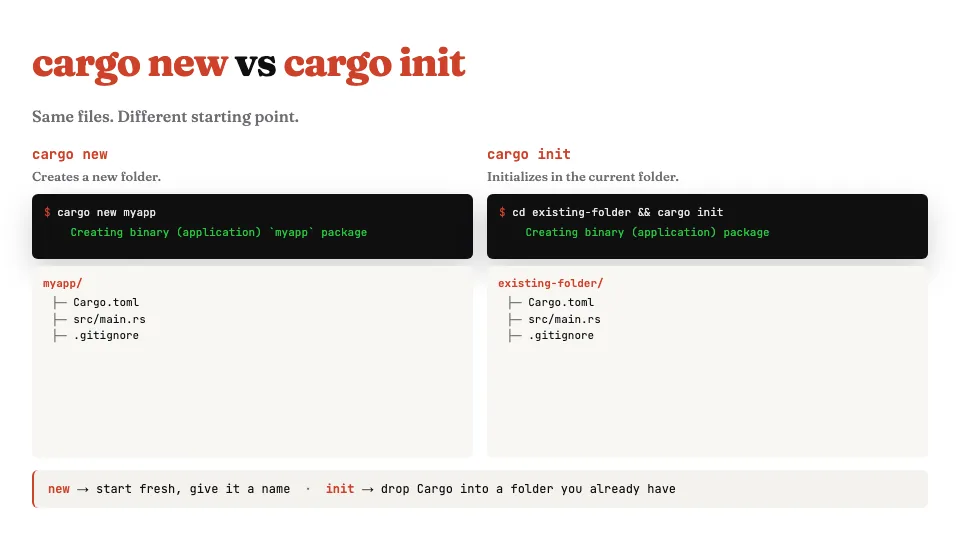
Cargo is Rust's build tool and package manager. It does most of the work for you. Which command you use depends on your starting point.
Two commands to start a project:
cargo new myappcreates a fresh folder with the project inside.cargo initdoes the same thing, but inside a folder you already have, so you can drop Rust into an existing directory.
Same files come out either way. Different starting point. This is why you have both commands.
Project structure
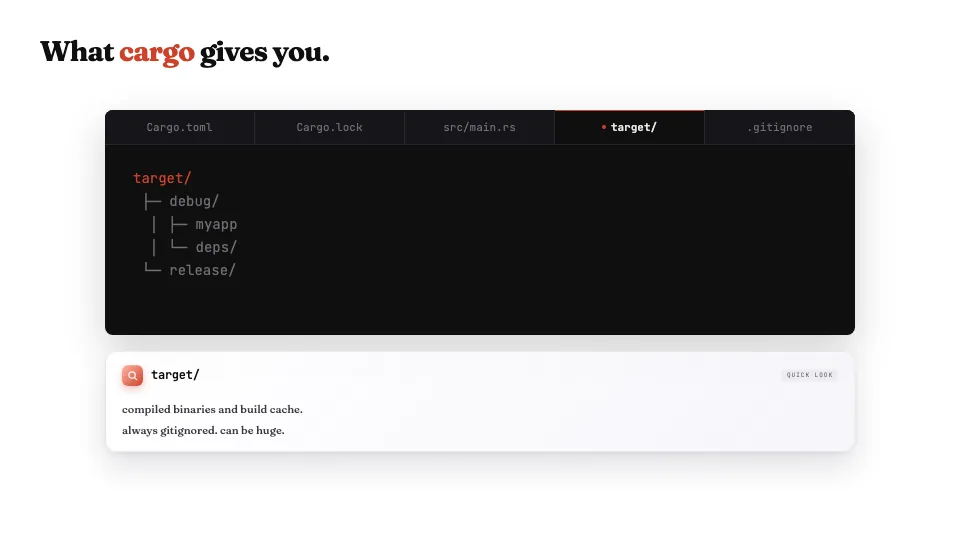
Five files, each with one job, and you always have them in both cases.
| File | What it does |
|---|---|
Cargo.toml | Your project's metadata. Name, version, dependencies. The file you'll edit. |
Cargo.lock | Pins exact dependency versions. Auto-generated. Don't hand-edit. |
src/main.rs | Where you write Rust. |
target/ | Where compiled binaries go. Always gitignored. |
.gitignore | Cargo seeds this for you. |
Chapter 2: Your first program
Hello, world
fn main() {
    println!("Hello, world!");
}
Run cargo new hello, open main.rs, and you'll see the classic hello world. Run cargo run from the terminal. Cargo compiles your code and runs it.
From zero to running in thirty seconds. Now let's gp into some details.
fn main, piece by piece
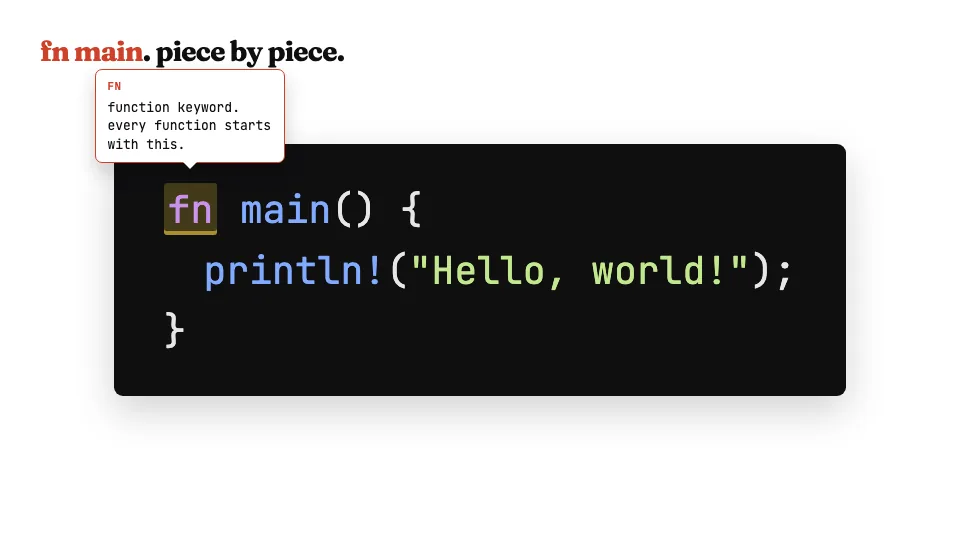
Let's break this down piece by piece.
fnis the function keyword. Every function in Rust starts here.mainis a special name. When you run a Rust program, execution starts here. Every binary needs exactly onemain.(): the empty parens meanmaintakes no arguments.{ ... }: the curly braces are the function body. Everything inside runs when the function is called.println!is a macro. Macros expand at compile time. The exclamation mark is how Rust tells you something is a macro, not a regular function."Hello, world!": the text in double quotes is a string literal. That's what gets printed.
Chapter 3: Variables and mutability
let, type inference, and const
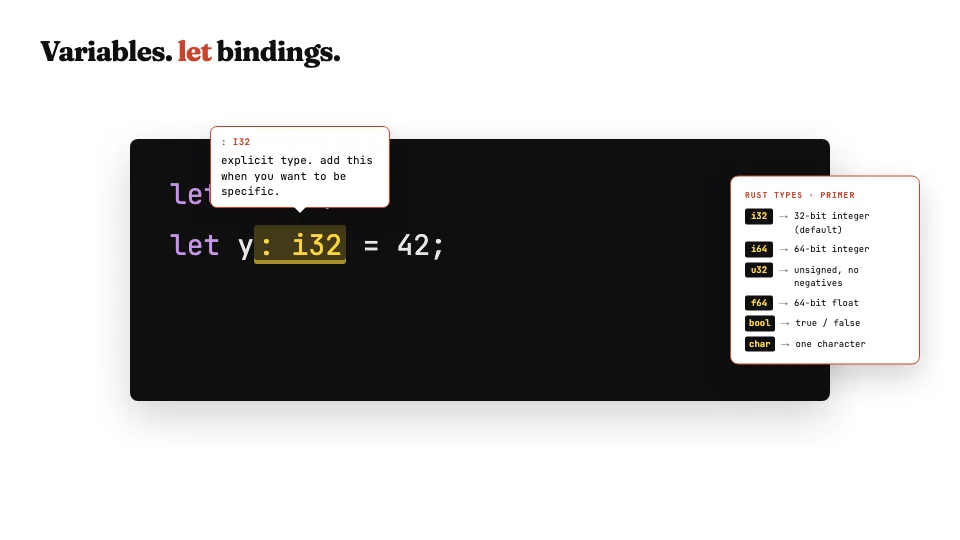
In Rust, you use let to bind a value to a name.
let x = 5;              // Rust infers i32, the default integer
let y: i32 = 42;        // or annotate the type yourself
let name = "Rust";      // strings work the same way
Constants are different:
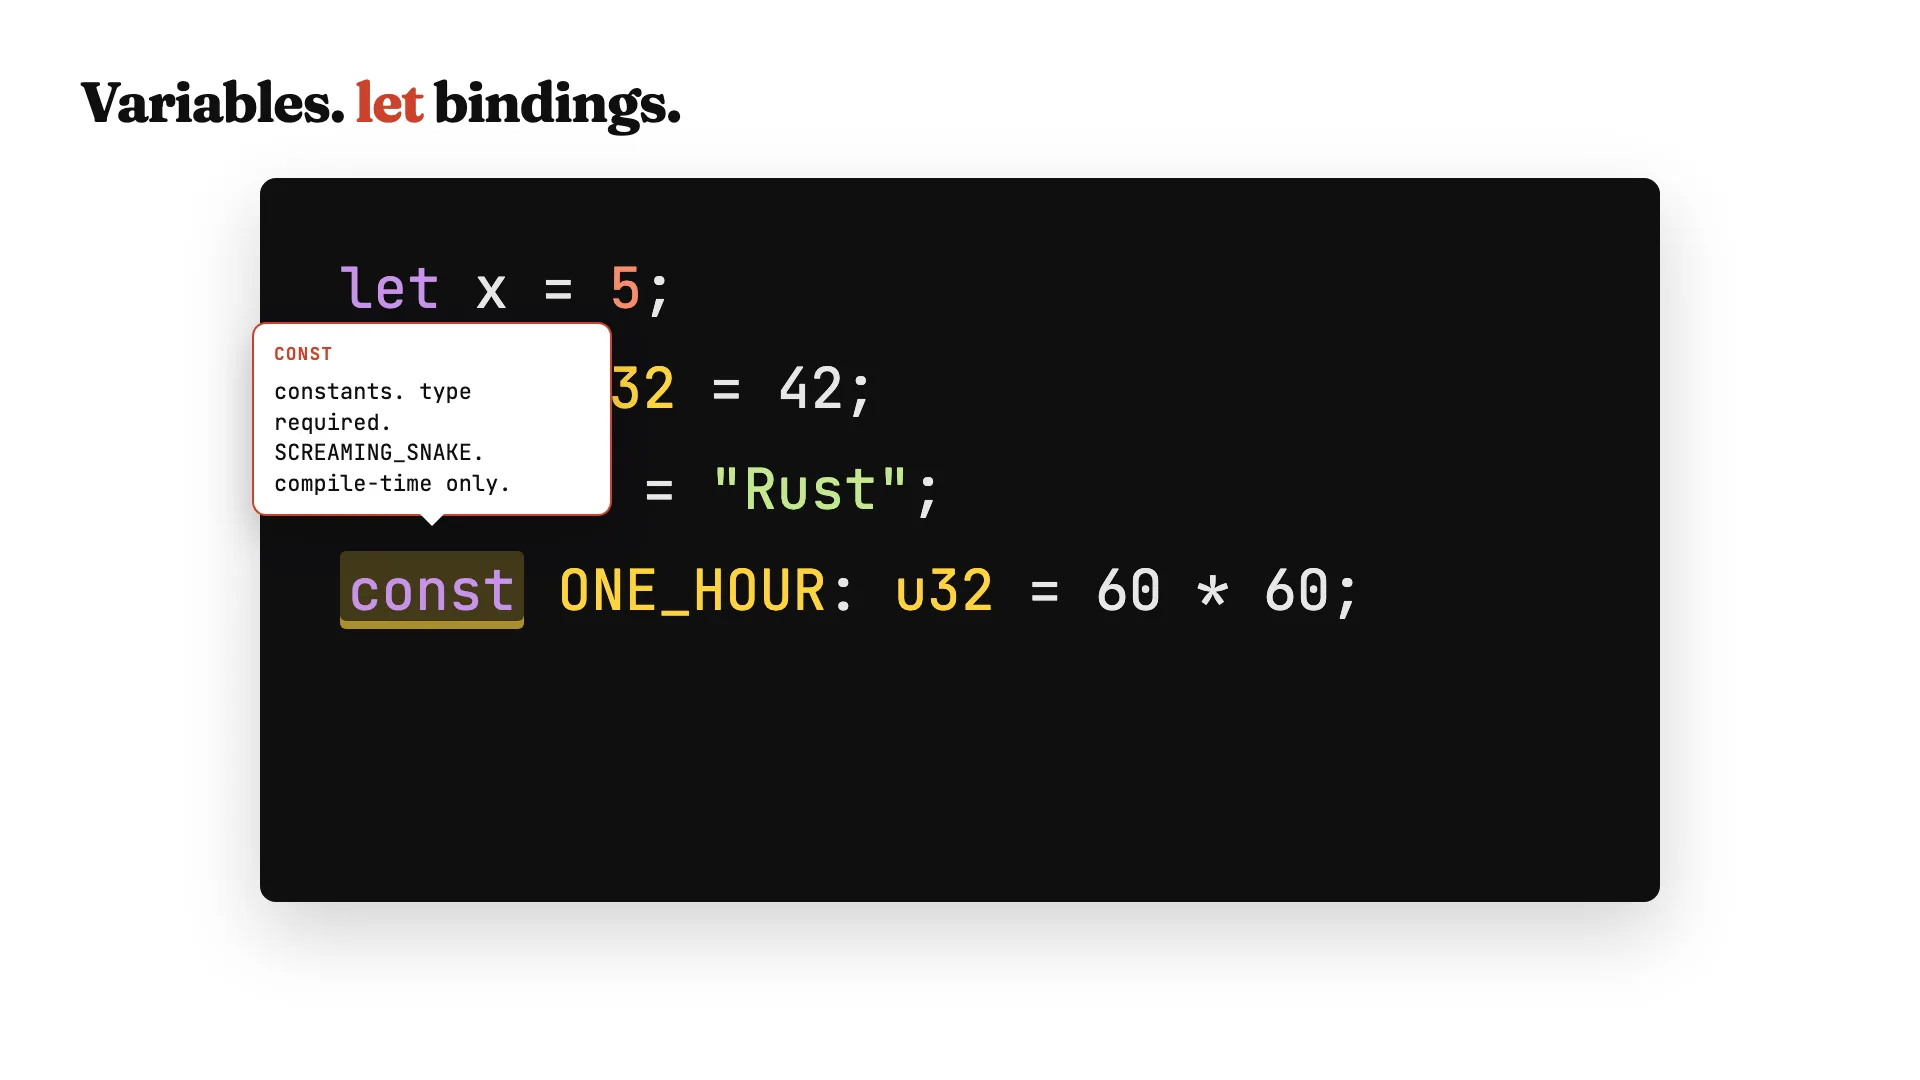
const MAX_SCORE: u32 = 100;Use the const keyword, the type is required, and the name is in SCREAMING_SNAKE_CASE. Constants are evaluated at compile time, not runtime.
Shadowing
Try to reassign a regular let, and the compiler stops you. Variables are immutable by default.
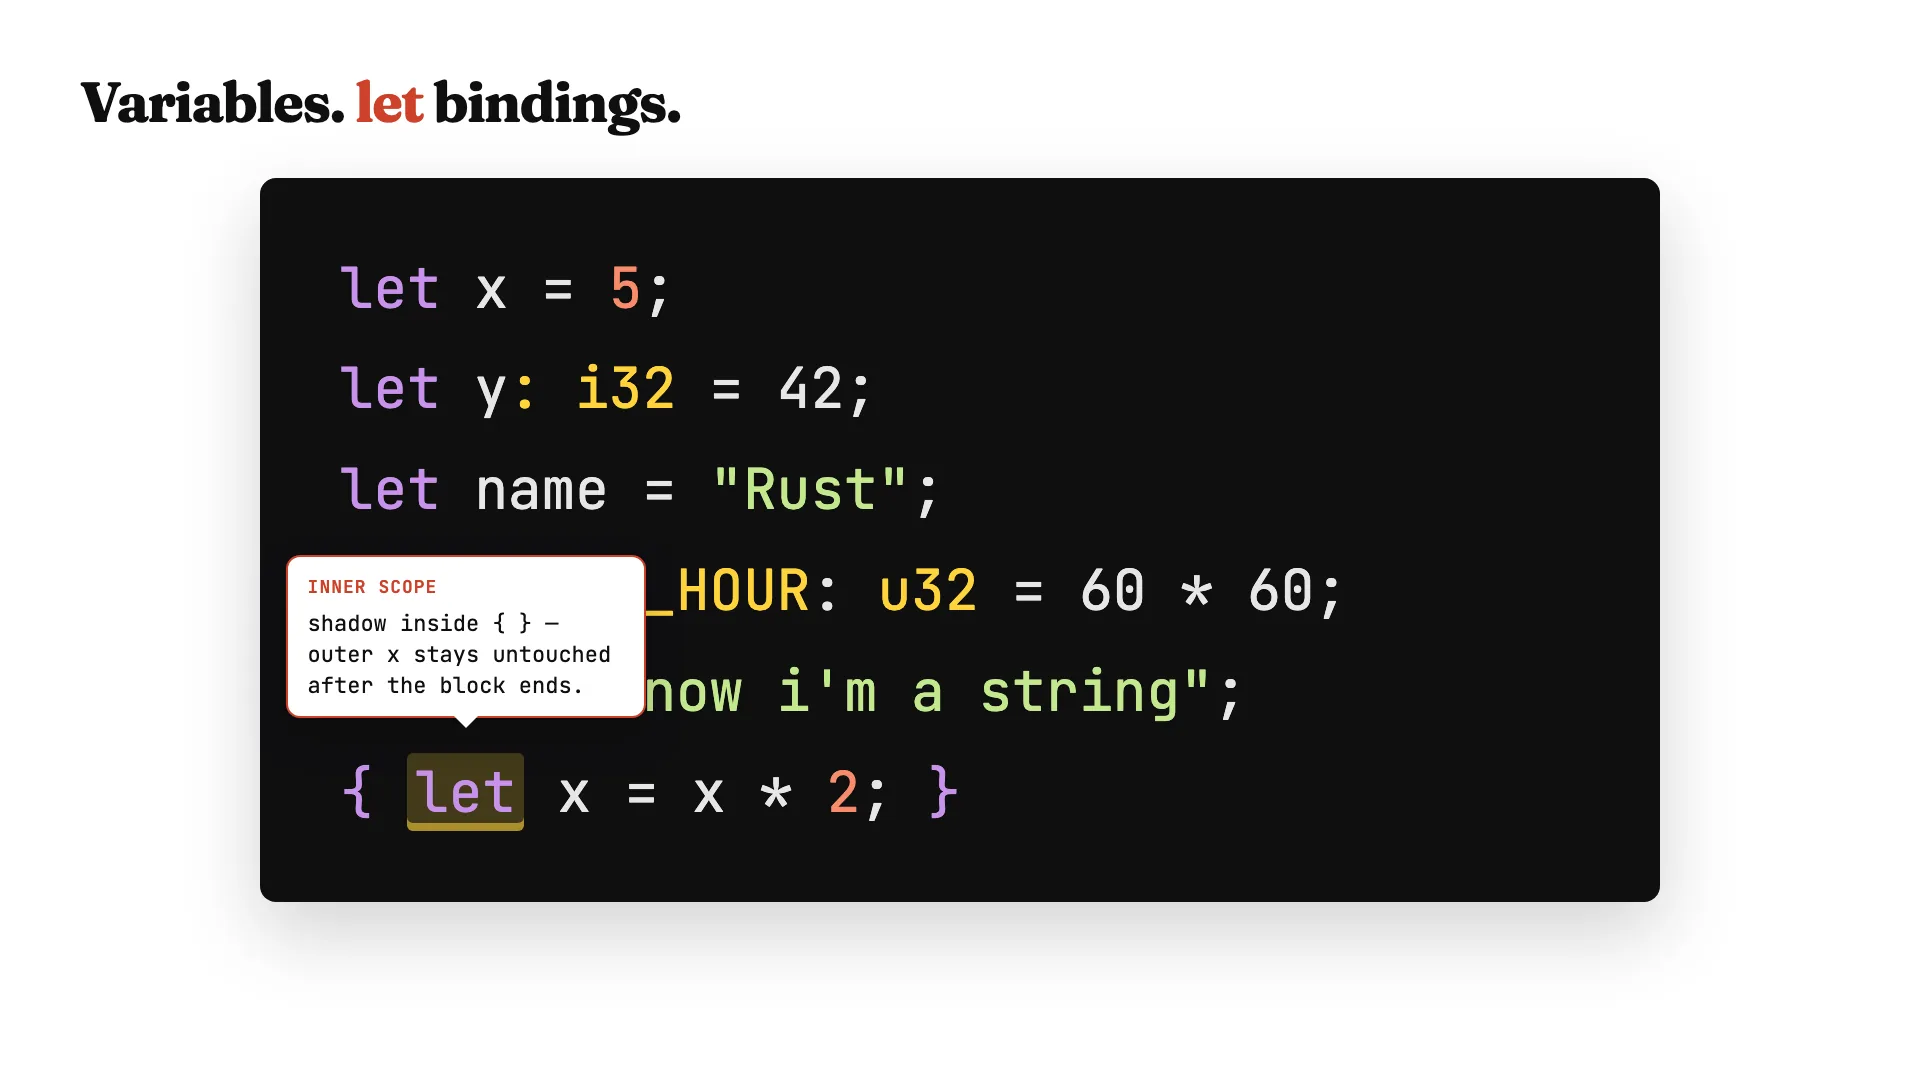
But shadowing is a Rust quirk. You can use let again with the same name, and it creates a brand new binding. Useful when you want to change the type:
let spaces = "   ";              // string
let spaces = spaces.len();       // now a number
You can even shadow inside a block. Inside the curly braces, x is a new variable. Once the block ends, the outer x is back, untouched.
mut
If you do want to change a value, opt in with mut:
let mut counter = 0;
counter += 1;
Now you can reassign as many times as you want, as long as the type stays the same.
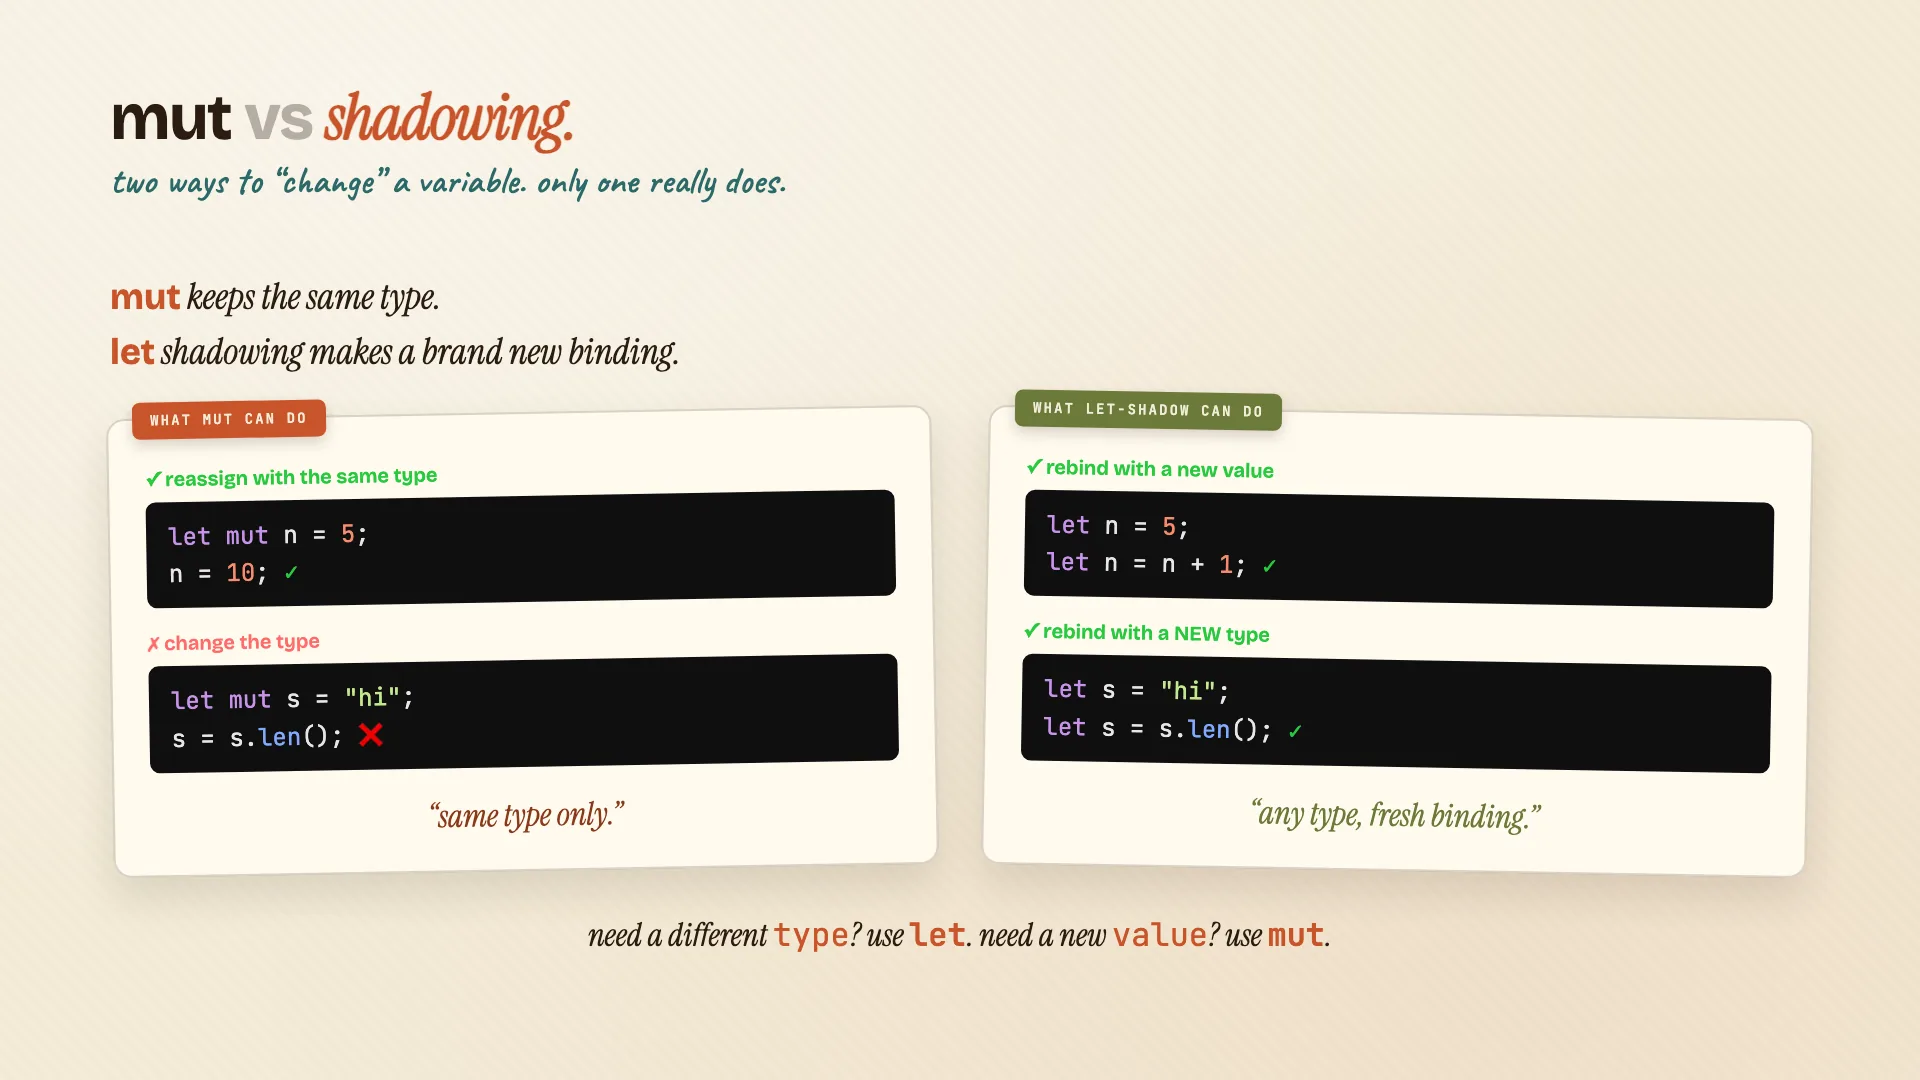
Here's the difference actually:
mutkeeps the same type. You can change the value, but not what the value is.- Shadowing is more powerful. Same name, brand new binding, fresh type.
Need a different type? Use let. Need a new value, same type? Use mut.
Chapter 4: Data types
Scalar types
Scalar types hold a single value. Five flavors: integers, unsigned integers, floats, booleans, chars.
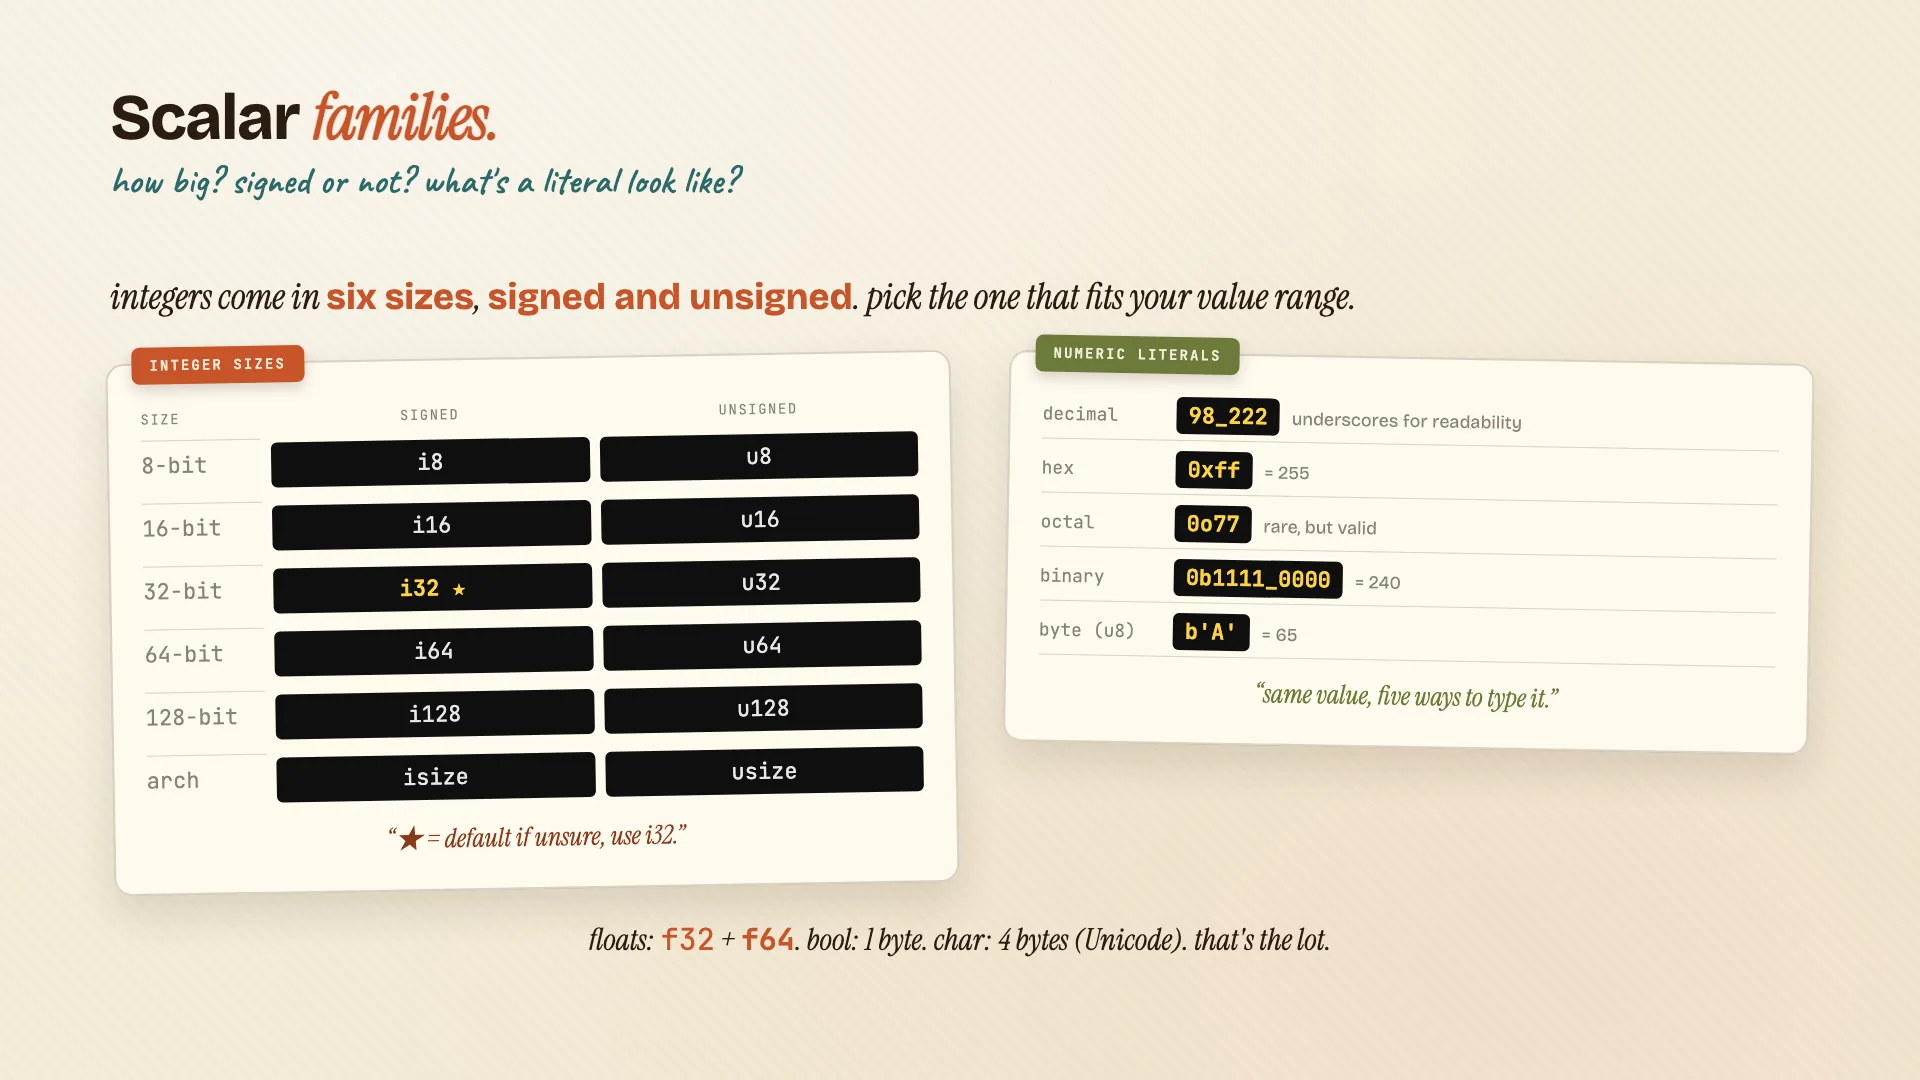
i32 is the default integer. Thirty-two-bit signed, fastest on most CPUs. Unsigned integers like u64 are zero or positive only: great for sizes, counts, indexes.
Integers come in six sizes, signed and unsigned. Pick the one that fits your value range. If you're not sure, use i32. There are five ways to write a number literal: decimal, hex, octal, binary, and a single byte literal for u8.
f64 is the default float. Sixty-four-bit double precision.
Booleans are true or false. One byte. No truthy ints in Rust. Be explicit.
Chars are a single Unicode scalar value. Four bytes. Use single quotes. Yes, emoji works.
Compound types: tuples and arrays
Compound types group multiple values into one. Two flavors, very different.
Tuples are fixed-length, mixed-type. The type is parens, with each item's type, in order:
let pair: (i32, f64, char) = (5, 6.4, 'a');
let (x, y, z) = pair;     // destructure
let first = pair.0;       // or use dot-access
The empty tuple, (), is called the unit. You'll see it as a default return type.
Arrays are different. Same type, fixed length:
let nums: [i32; 5] = [1, 2, 3, 4, 5];
let zeros = [0; 10];      // shortcut: ten zeros
let first = nums[0];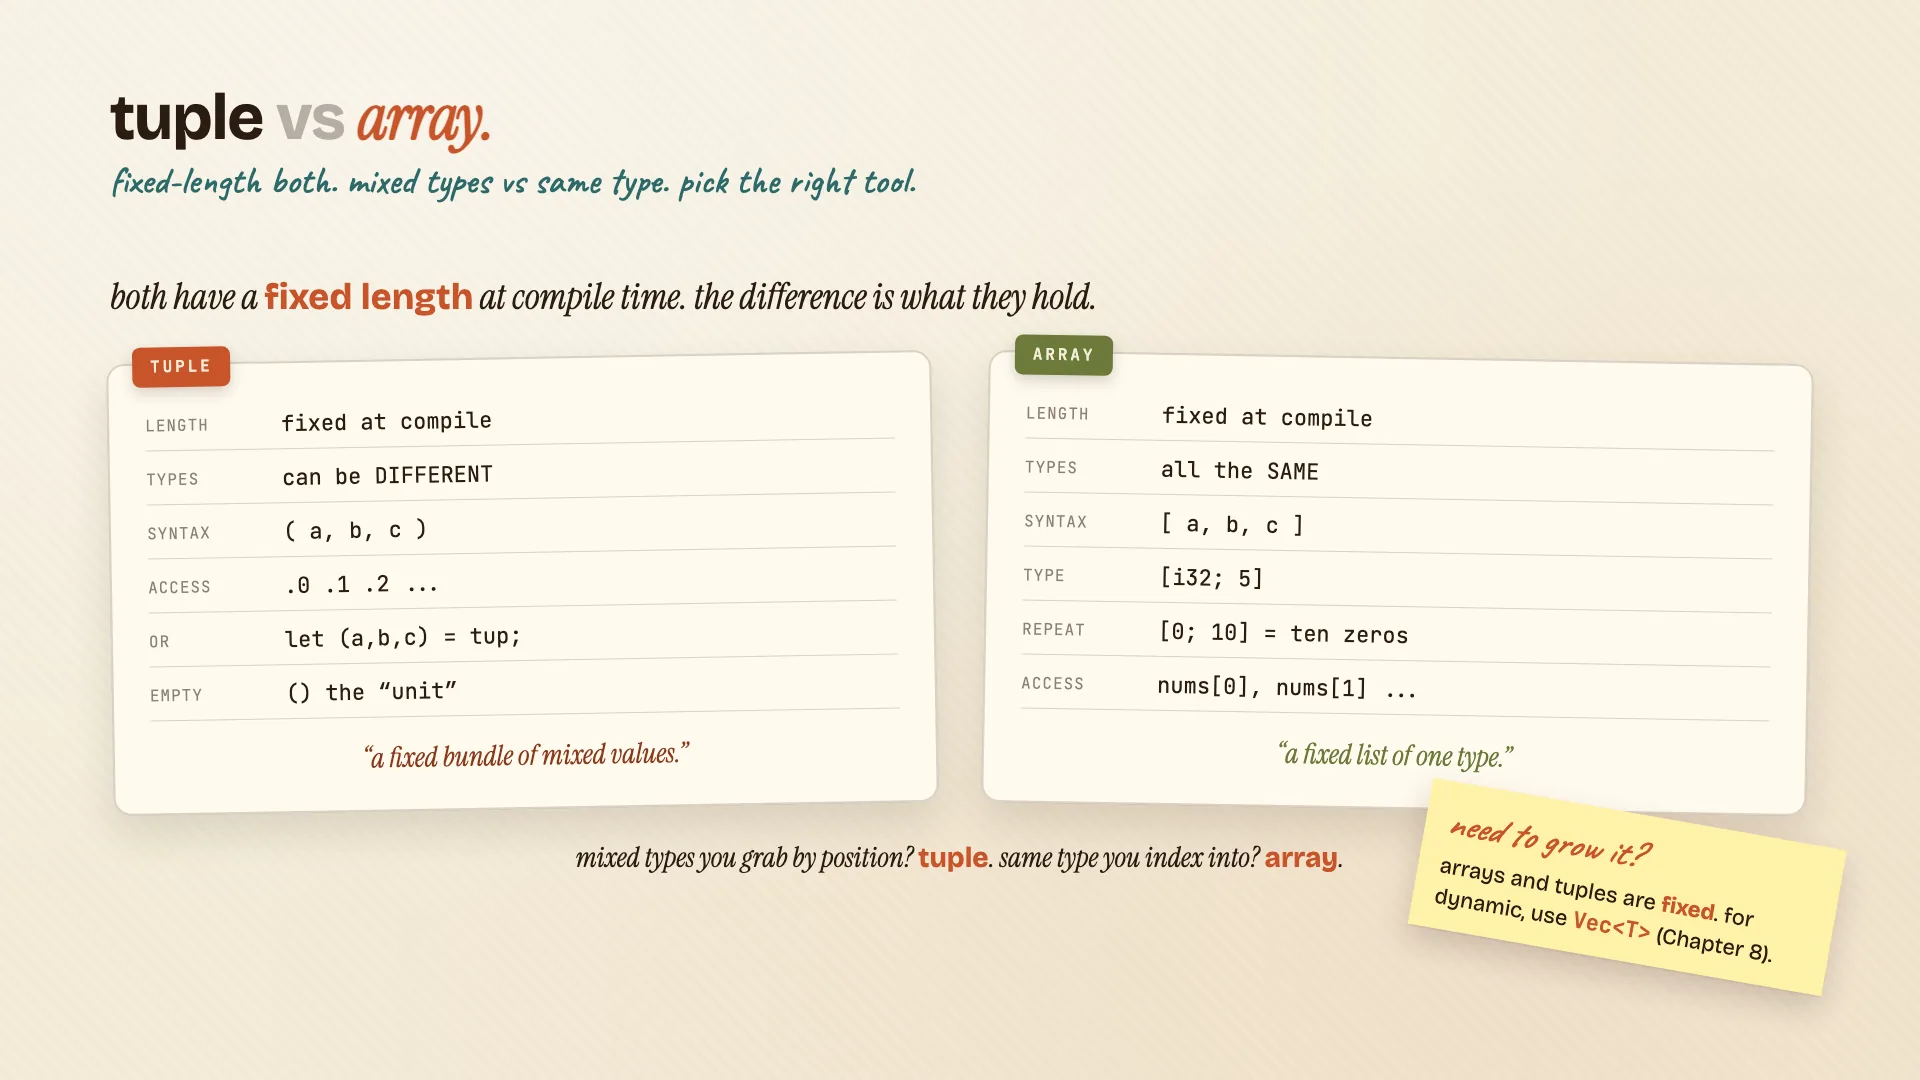
Both are fixed at compile time. If you need to grow it, you want a Vec. We'll cover that in a later video.
Your first struct
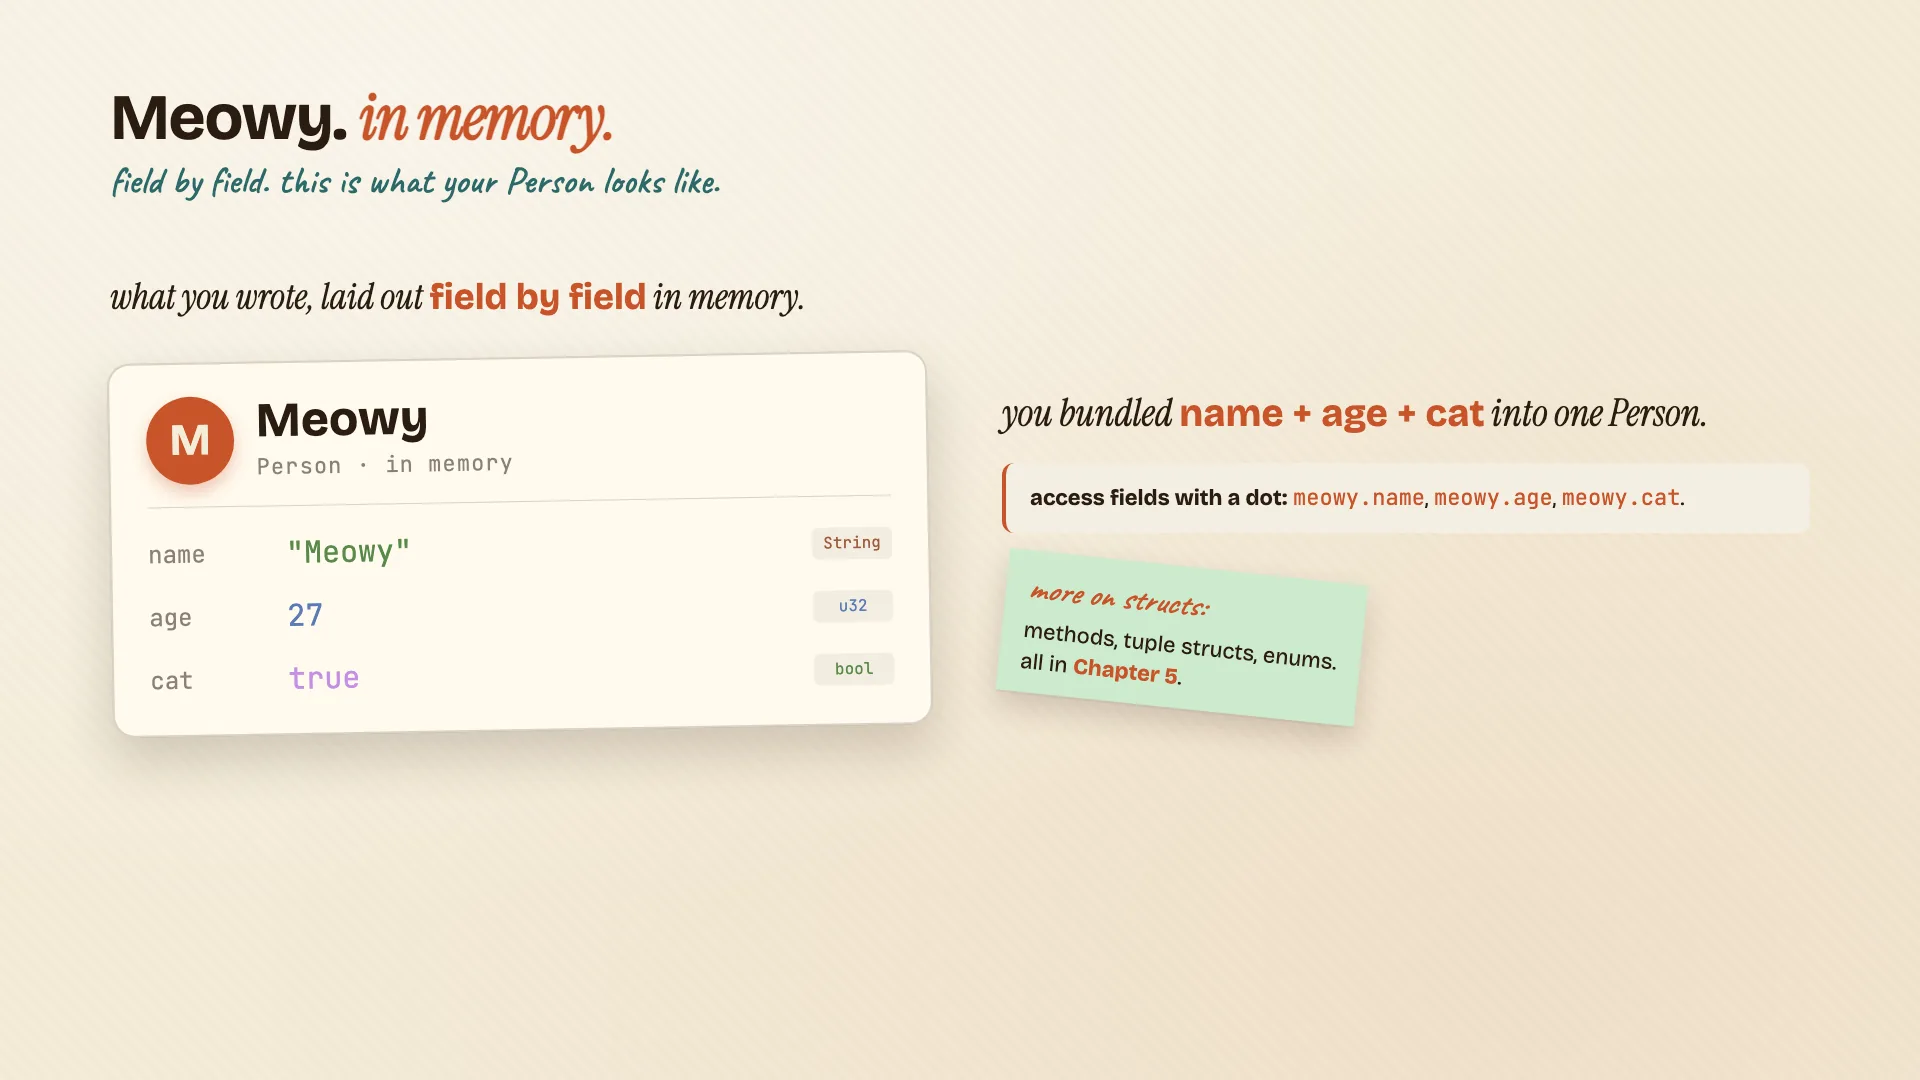
A struct is your custom shape for related data.
struct Person {
    name: String,
    age: u32,
    cat: bool,
}
Define it with the struct keyword and a name in PascalCase. Inside the curly braces, list each field as name: type, comma at the end.

To make an instance, use the type name with curly braces and fill in every field:
let meowy = Person {
    name: String::from("Meowy"),
    age: 3,
    cat: true,
};

println!("{} is {}", meowy.name, meowy.age);
Notice the name field uses String::from. We're converting a string slice into an owned String, because that's what the field expects.
There's a lot more you can do with structs (methods, tuple structs, enums), but that's chapter 5 material. We'll get there in Episode 03.
Chapter 5: Functions and control flow
Functions
We've already seen fn main. fn declares a function, parens for parameters, curly braces for the body. snake_case names by convention.
fn greet(name: &str) {
    println!("Hello, {}", name);
}

fn plus_one(x: i32) -> i32 {
    x + 1     // last expression, no semicolon, is the return value
}
A few rules:
- Parameters always need an explicit type. Rust never infers them.
- Return values use
->.fn plus_one(x: i32) -> i32. - The last expression with no semicolon is the return. Add a semicolon and you've turned an expression into a statement. Statements return unit (
()), and your function won't compile.
That last one is the gotcha. Watch for it.
Comments
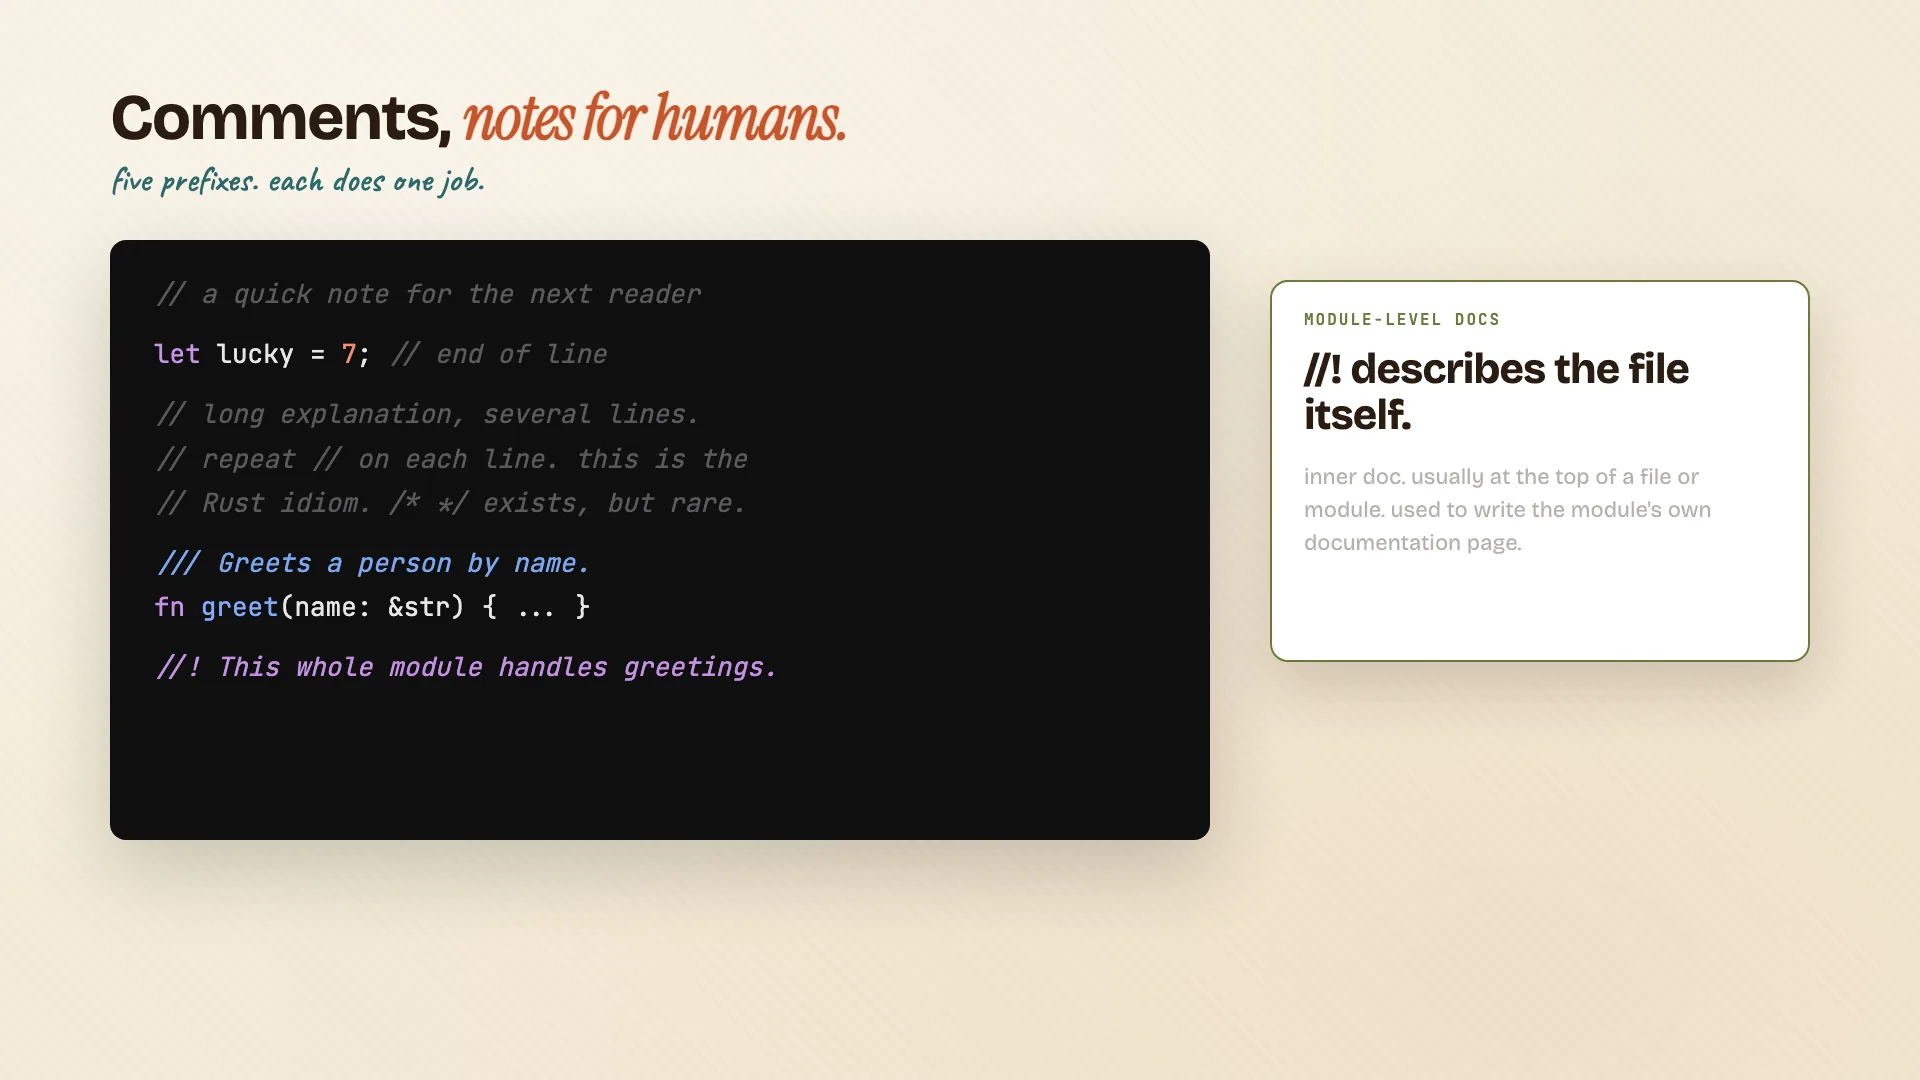
Comments are notes for humans. Five prefixes, each does one job:
// line comment
//
// repeat // for multi-line, this is the Rust idiom

/// Outer doc comment, attached to the next item.
/// Rendered by `cargo doc`.

//! Inner doc comment, for the file or module itself.
if / else
if and else give you a fork in the road.
if n > 0 {
    println!("positive");
} else {
    println!("zero or negative");
}
A few things to notice:
- No parens around the condition. Unlike C or Java or JavaScript, Rust doesn't want them.
- The condition has to be a
bool. Not an int, not a string. Rust won't auto-convert. To check non-zero, writen > 0explicitly. ifis an expression. It can return a value.
let label = if condition { 5 } else { 6 };The result of the if becomes label. Both arms have to return the same type.
For more than two cases, chain else if. They check top to bottom and stop at the first true. If the chain gets long, reach for match instead. We'll cover that in a later video.
Loops
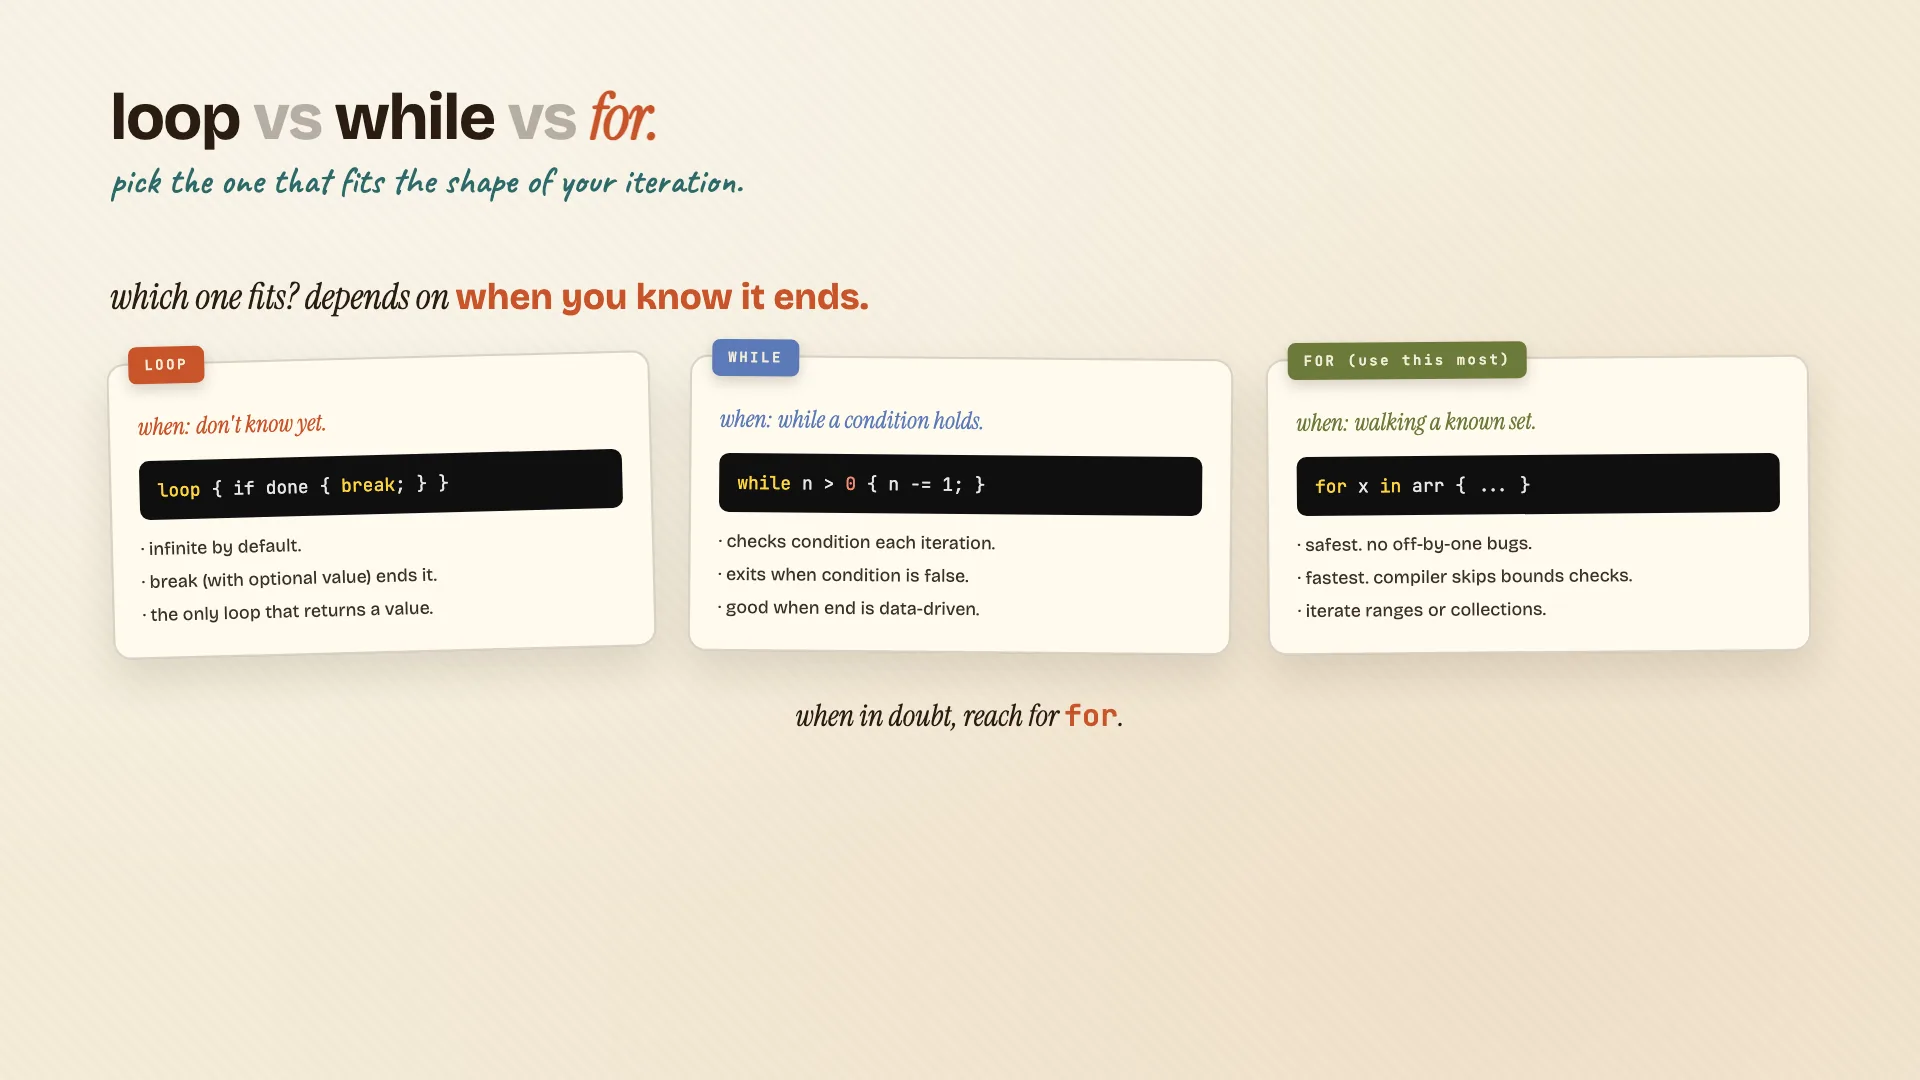
Three loop types in Rust:
// loop: runs forever, until you break
let result = loop {
    counter += 1;
    if counter == 10 {
        break counter * 2;   // break can return a value!
    }
};

// while: checks a condition before each iteration
while n != 0 {
    println!("{}", n);
    n -= 1;
}

// for: walks a collection or a range
for x in 0..5 {
    println!("{}", x);
}
Quick mental model:
loopruns forever, until you callbreak. You decide when it stops.whilechecks before each iteration. Exits when the condition is false.forwalks a collection or a range. The most common loop you'll write.
for is the safest (no off-by-one bugs) and usually the fastest (the compiler can skip bounds checks it knows are unnecessary). When in doubt, reach for for.

For nested loops, label them with a quote and a name:
'outer: for i in 0..5 {
    for j in 0..5 {
        if j == 3 { break 'outer; }
    }
}
Now break or continue can target the loop you want, instead of just the innermost one.
The compiler is your friend
Here's something to keep in mind as you start writing Rust.
The compiler is your friend. It catches bugs before they ever run. The error messages are some of the best in any language. Read them, don't fight them.
That's the Rust difference.
What's next
That's a wrap. You now know enough Rust to write a real program.
Up next, Episode 02: Ownership and the borrow checker. The heart of what makes Rust special, and the part that scares people off. We'll make it click.
If you'd like to follow along:
- Companion guide: zerotorust.com
- YouTube: @MeowyTheDev
- X: @me256ow
See you in the next one.